
Defra modules of Rescue 3 training courses
Defra Module |
Defra title and description |
Rescue 3 Europe course |
| Module 1 | Water & Flood Awareness
General water safety awareness training |
Water and Flood Awareness (AW) |
| Module 2 | Water & Flood First Responder
To work safely near and in water, using land-based and wading techniques |
Swiftwater and Flood First Responder (SFR) |
| Module 3 | Water & Flood Rescue Technician
Specialist rescue operation |
Swiftwater and Flood Rescue Technician (SRT) |
| Module 4 | Water & Flood Rescue Boat Operator
Rescue boat operations |
Swiftwater & Flood Rescue Boat Operator (SFRBO) |
| Team Commander | Asset Commander
Water team related incident command |
Water and Flood Team Leader (WFTL) |
| Module 5 | Water & Flood Incident Management
Water-related operational and tactical incident command |
Management of Water and Flood Incidents (MWFI) |
| Module 6 | Flood Rescue Tactical Advisor Provide advice to tactical and strategic commanders and credentialing. |
|
| Water and flood non-rescue support operations training module (Annex G) |
Water and flood non-rescue support operations training module
Workers and volunteers who work in support of flood response but do not come from rescue organisations. |
Flood Operations – Foundation (FO-F)
or |
See also Alternatives to ‘Defra courses’ for industrial working in and near water
Tactical choices for rescues from vehicles in water
Introduction
Rescue from vehicles in water continues to be all too common during flood events and vehicles trapped in moving water can present great risks not only to their occupants but also to those undertaking the rescue.
Thankfully, the increase in the number of artificial white water courses has seen it becoming much easier to deliver realistic yet controlled training in this area. I can recall back in 2004 working with Martin Bills from Nottinghamshire Fire and Rescue Service and Tim Rogers from Charlotte Fire Department in the USA, on what was probably the UK’s first Rescues from Vehicles in Water workshop at the Tees Barrage Whitewater Course. Since then, many hundreds of responders have attended such workshops and the lessons learnt and techniques developed in these courses have been put to good use in real rescues on many occasions.
In this article, I will focus on the decision-making criteria that will drive tactical choice at these incidents. In the second article, I will look at techniques for performing rescues from vehicles in water.
Vehicle behaviour in water
There is no shortage of footage on YouTube etc showing people getting the car-versus-water equation wrong. However, these videos do confirm some of the key aspects of vehicle behaviour in
moving water, namely:
- Vehicles will naturally pivot around the heaviest point (normally the engine). Generally, this means they will tend to move to facing upstream – unless it’s a VW Beetle!
- Vehicles on hard surfaces under moving water that end up sideways to the current tend to roll over.
We can generally split rescues from vehicles in water into two categories:
- Low energy shallow water where the vehicle has not moved – these are very common and vehicles are usually accessible using shallow water wading techniques.
- Higher energy water where the vehicle has already moved (and possibly rolled). These can present much more complex rescue problems because of the higher energy water, potential damage to the vehicle and potential for t he vehicle to be trapped against an object restricting access to and egress from the vehicle.
Floating and/or moving?
One of the key considerations for anyone faced with undertaking a rescue from a vehicle in water is whether the vehicle is moving and/or floating and if not whether this could be the case in the
near future or during the course of the rescue?
The difference between the weight of the vehicle, its contents and occupants and the buoyancy force created by the vehicle displacing water will determine if the vehicle floats. Similarly, if the force
of any moving water acting upon the vehicle is greater than the frictional force between the vehicle and the surface it ‘s resting on then the vehicle will be moved by the flowing water.
Thus, depending upon water speed (if any) and depth of water, a vehicle could remain in situ, it could float but not be moved or it could be be moved downstream without floating.
Water level considerations
Given that water speed and water depth are two of the key factors that will determine whether a vehicle in water will move, these are priority considerations when undertaking rescues for vehicles in water. In particular, we need to consider the current water level and whether this is likely to increase/decrease. As soon as possible we need to be gauging the water level both at the rescue scene and where any upstream spotters have been located. This can be as simple as poking a stick into the riverbank to mark the current water level. Whilst we might anticipate water level rises and falls due to recent and current rainfall, snow thaw etc. by actually marking the water level as soon as possible we can quickly determine if there are any significant water level rises/falls and these in t rn will inform our decision making.
For example, faced with a car in flood water which has not yet moved, information from our on-site measurement that the water level is dropping will confirm that the vehicle is unlikely to move and may reduce the need to secure the vehicle prior to undertaking any rescue activities. Equally, faced with the same scenario but receiving confirmation from our measurement that water levels are increasing might confirm the need to secure the vehicle as a priority to prevent later movement as water levels rise. By training our first response crews on the importance of early water level
measurement we can provide critical risk information to specialist water rescue crews as they arrive on scene. There are other factors that affect a vehicle’s effective weight and buoyancy which in turn can determine if a vehicle will float and or move and these will be looked at later.
Are the occupants wet?
As we’ve seen above, having some knowledge on potential water level changes helps up determine priorities and actions. Equally information on the state of the vehicles occupants is
vitally important. Many factors such as the vehicle design and condition will determine if the occupants are still pretty much dry or whether they are sitting in cold water. If we have no vehicle movement worries and dry occupants we may have the time to apply techniques that allow for the occupants to be removed from the vehicle without getting them wet e.g. use of sled and boats. However, if the occupants are sitting in cold water and are already wet then removing them from the cooling effects of this water is time-critical especially if they are elderly or children or there are
medical considerations.
 Paul O’Sullivan is the Managing Director of R3 Safety and Rescue – specialist rescue training and equipment supply business based in North Wales, UK. He’s been delivering swiftwater and flood rescue training for over 20 years and teaching Rescues from Vehicles in Water classes since 2004. He sits on the UK’s National Fire Chief’s Council Inland Water Technical Response Group.
This article originally appeared in Technical Rescue Magazine, and is reproduced with permission from the author.
Opciones tácticas para rescate con vehículos en agua
Translated from the original article in English.
Introduccion a rescate con vehículos en el agua
El rescate con vehículos en el agua es una práctica muy común durante las inundaciones y los vehículos localizados dentro de las aguas en movimiento pueden presentar grandes riesgos, no sólo para sus ocupantes sino también para los que realizan el rescate.
Afortunadamente los servicios de emergencia cada vez están más concienciados y se unen a la formación de rescate en aguas rápidas, y en muchas ocasiones en la tecnificación con vehículo en el agua que se imparte desde Rescue 3 Europe. En España recientemente se han realizado unas jornadas de Rescate en Accidentes de Trafico con una exhibición de rescate con vehículo en el agua en Granada en su 200 aniversario. También se llevan haciendo cursos prácticos más de 4 años, introducido vehículos en Murillo de Gallego y Benamejí para la formación de servicios de emergencia de toda España.
En este artículo, nos centramos en los criterios que debemos manejar para la toma de decisiones que impulsarán la elección táctica en estos incidentes. En un segundo artículo (Técnicas para rescate con vehículos en el agua), analizaremos las técnicas para realizar rescates con vehículos en el agua.
Comportamiento del vehículo en el agua
No faltan vídeos en YouTube, etc., que muestran a personas que se equivocan en la ecuación coche-agua. Sin embargo, estos vídeos confirman algunos de los aspectos clave del comportamiento de los vehículos en aguas rápidas, a saber:
- Los vehículos pivotarán naturalmente alrededor del punto más pesado (normalmente el motor). Por lo general, esto significa que tenderán a moverse hacia la corriente, ¡a menos que se trate de un VW Escarabajo o un autobús con el motor en la parte trasera!
- Los vehículos que se encuentran en superficies duras como cemento o brea, tienden a ponerse de lado a la corriente y a volcar.
En general, podemos dividir los rescates de vehículos en el agua en dos categorías:
- Aguas poco profundas de baja energía donde el vehículo no se ha movido – son muy comunes y los vehículos suelen ser accesibles utilizando técnicas de vadeo en aguas poco profundas.
- Aguas de mayor energía en las que el vehículo ya se ha movido (y posiblemente haya rodado). Estas pueden presentar problemas de rescate mucho más complejos debido a la mayor energía del agua, los posibles daños al vehículo y la posibilidad de que el vehículo quede atrapado contra un objeto que restrinja el acceso y la salida del vehículo.
Vehiculo flotante y/o en movimiento
Una de las consideraciones clave para cualquier persona que se enfrente a un rescate de un vehículo en el agua, es si el vehículo se está moviendo y/o flotando y, si esto no es así, si podría ocurrir en un futuro próximo o durante el transcurso de la operación.
La diferencia entre el peso del vehículo incluyendo su contenido (ocupantes), con la fuerza de flotación creada por el vehículo al desplazarse por el agua, determinará la flotabilidad del mismo. Del mismo modo, si la fuerza del agua en movimiento que actúa sobre el vehículo, es mayor que la fuerza de fricción generada por el vehículo en la superficie sobre la que descansa, el vehículo tenderá a moverse empujado por el fluir del agua.
Por lo tanto, dependiendo de la velocidad del agua (si la hay) y de la profundidad del agua, un vehículo podría permanecer in situ, podría flotar pero no moverse o podría ser movido río abajo sin flotar.
Consideraciones sobre el nivel del agua
Dado que la velocidad y la profundidad del agua son dos de los factores clave que determinan si un vehículo se puede mover, serán dos consideraciones prioritarias a la hora de realizar rescates de vehículos en el agua. En particular, debemos tener en cuenta el nivel de agua en el momento del rescate y si es probable que suba o baje. Tan pronto como sea posible, debemos medir el nivel del agua tanto en el lugar del rescate como en el lugar donde se encuentran los observadores aguas arriba. Esto puede ser tan sencillo como clavar un palo en la orilla del río para marcar el nivel de agua. Aunque podemos anticipar las subidas y bajadas de nivel mediante los Sistemas Automáticos de Información Hidrológica (SAIH) que cada cuenca dispone. Allí podemos ver el caudal en tiempo real, la acumulación de precipitación, el nivel de los embalses etc. Si conocemos el nivel del agua con antelación, podemos determinar rápidamente si hay subidas o bajadas significativas, lo que nos ayudará a tomar decisiones.
Por ejemplo, ante un coche inundado que aún no se ha movido, tener información de que el nivel del agua está bajando, confirmará que es poco probable que el vehículo se mueva y puede reducir la necesidad de estabilizar el vehículo antes de emprender cualquier actividad de rescate. Del mismo modo, si nos enfrentamos a la misma situación pero recibimos la confirmación de nuestras mediciones de que el nivel del agua está aumentando, podría confirmar la necesidad de estabilizar el vehículo como prioridad, para evitar que posteriormente se mueva cuando el nivel del agua suba. Es importante formar a los servicios de emergencia, sobre todo aquellos que vayan a llegar inicialmente al incidente de la importancia de saber las tendencias en el ascenso y descenso del caudal. Ello nos dará información crítica sobre el riesgo que tendrán los equipos de rescate acuático cuando lleguen al lugar de los hechos.
Hay otros factores que afectan al peso efectivo de un vehículo y a su flotabilidad, que a su vez pueden determinar si un vehículo flotará o se moverá.
¿Están mojados los ocupantes?
Como hemos visto anteriormente, tener algún conocimiento sobre los posibles cambios en el nivel del agua ayuda a determinar las prioridades y las acciones. Igualmente, la información sobre el estado de los ocupantes del vehículo es de vital importancia. Muchos factores, como el diseño y el estado del vehículo, determinarán si los ocupantes siguen prácticamente secos o si están sentados en agua fría. Si el vehículo tiende a no moverse y los ocupantes están secos, podemos tener tiempo para aplicar técnicas que permitan sacar a los ocupantes del vehículo sin mojarse, por ejemplo, usando trineos de rescate o rafts. Sin embargo, si los ocupantes están sentados en agua fría y ya están mojados, sacarles del frío del agua es una cuestión prioritaria, especialmente si son ancianos o niños o hay consideraciones médicas que así lo requerirán.
Artículo fundamentado en ‘Tactical choices for rescues from vehicles in water’ originalmente adaptado por Paul O’Sullivan Director Gerente de R3 Safety and Rescue empresa especializada en la formación y el suministro de equipos de rescate con sede en el norte de Gales, Reino Unido. El artículo apareció originalmente en la revista Technical Rescue y se reproduce con permiso del autor.
This article was originally written in English, and has been translated by Fermin Perez Larrea of River Guru.
Weirs and Low Head Dams – A Guide For Rescuers – Part 2
It would appear that a common theme associated with incidents involving weirs is an underestimation of the danger and entrapment potential of the weirs. This applies to both members of the public, emergency responders and professional river users such as white water rafting companies.
In part one of this series I looked at different types of weirs and options for conducting rescues from weirs. In this article I will move on to consider how we can use a weir assessment system to help inform our understanding of the hazard level of a weir and the difficulty of performing a rescue of a person trapped in a weir.
Following a fatality in a North Wales weir in 2005 it was identified that there was a need to develop a tool that would allow the hazard level presented by entrapment in a weir to be assessed. The result of this is the Rescue 3 Europe/Natural Resources Wales Weir Risk Assessment which I co-designed. This has been in use now for over 10 years and adopted by many organisations in both Europe and North America and has proven to be a very useful resources for determining hazard and risk levels presented by weirs. As a rescue trainer, I was particularly interested in the risks and difficulties of undertaking rescues from weirs, so in addition to assessing the entrapment potential of a weir, the tool can also be used to assess rescue difficulty. Once we started trialling the assessment, we were asked if we could include a process to assess the public safety risk presented by a weir and this was also incorporated into the tool, so we ended up with an assessment tool with 3 possible uses:
The assessment tool can be downloaded from the Rescue 3 Europe website and is currently available in English, French, German, Italian, Spanish, Greek and Croatian.
Dealing with water level changes
Not all weirs will present an entrapment hazard and many of those that do will not have the same level of hazard across all water levels, If we use the tool to assess a weir we are only determining an entrapment hazard etc. at that water level. If we wish to develop a hazard/risk profile for the weir then we need to assess the weir at a number of water levels and I would suggest a minimum of three assessments to correspond with low, medium and high flow conditions.
Assessing entrapment hazards
Similar to how a kayaker will ‘read’ the surface features of a white water river to determine the hazards and best route through a rapid, we can use the visible features of a weir to determine its potential to retain a person who ends up in the weir. There is no single criteria that will ensure entrapment, but rather we need to look at a number of criteria and use these to develop an overall level of entrapment hazard. Not all criteria are given equal weighting when determining the entrapment hazard. For example the distance of the towback on the downstream side of the weir, which is a key entrapment indicator, is scored between 0 and 5, whilst the orientation of the weir to the flow is only scored between 1 and 3. A score of zero is given if that particular criteria is not present. If in high flow conditions the weir is totally submerged and there is no entrapment hazard then the assessment tool will give a hazard score of zero.
The criteria used to assess entrapment hazard are:
1. Towback
This is the surface water on the downstream side of the weir moving back upstream towards the weir face and is a key criteria for determining the entrapment hazard of the weir. It is measured as the horizontal distance from the boil line downstream of the weir back to the bottom of the face of the weir.
2. Depth of hydraulic/stopper
In some weirs the energy of the water creating the downstream boil line results in an elevated boil line. This will mean that the towback is faster and increases the entrapment potential. We measure the vertical height from the top of the boil line to where the tow back meets the base of the weir face. In practice this is probably one of the most difficult criteria to measure as there are often few reference features to measure against, particularly on larger weirs and those with high channel banks.
3. Height of the drop over the weir
The greater the drop over the weir the larger the energy being carried into the weir. If there is low energy (speed) water immediately downstream of the weir it means that the energy is being dissipated in the weir. Some of this can take the form of noise and spray etc, but often the majority is dissipated through strong, deep recirculation with the associated entrapment potential. This is measured as the vertical distance from the river level immediately upstream of the weir to where the towback meets the base of the weir face
4. Slope of the weir face
In a similar way to the previous criteria the more vertical the face of the weir the greater energy being carried into the weir. This is measured by estimating the angle between the weir face and vertical – the steeper the face of the weir the greater the score allocated for this criteria.
5. Floating debris in the hydraulic/stopper
Floating debris being held in the weir is a key indicator of the entrapment potential of a weir. Even if a weir has a large towback and elevated boil line it is unlikely to retain floating debris if there
are weaknesses/breaks in the hydraulic where it can wash out. The size and weight of the debris will also give some indication of the strength of the hydraulic and its associated entrapment potential. However, we must also be open to the fact that a weir may have the potential to hold floating debris, but is not doing so only because there is no floating debris currently present . This could be the result of recent high flow conditions which reduced the recirculation of the weir and caused all the floating debris to be washed downstream. To score this aspect we look at how much of the weir is retaining floating debris as a percentage of the whole width of the weir. Non floating debris in the weir e.g a large tree that has been carried downstream and is now resting on the base of the weir is not scored in this criteria as it is not indicative of the entrapment potential. It is obviously a hazard to anyone in the weir and is covered when assessing criteria 9 – Additional hazards in or downstream of the weir.
6. Uniformity of the hydraulic/stopper
With this we are looking for weaknesses/breaks (flush points) in the hydraulic/stopper where any floating objects trapped in the weir could be washed out downstream. If the hydraulic/stopper
is completely uniform with no weaknesses then the only route out of the weir is likely to be being recirculated in the water to the base of the weir and then hopefully being carried downstream when this water returns to the surface at the boil line.
7. Sides of the hydraulic/stopper
Here we are looking at what happens at the sides of the weir. If a trapped person swims or is taken by the recirculation to the side of the weir – is that side ‘open’ or ‘closed’. An open side will increase the possibility for self-rescue, being washed out or being rescued from the weir. If the sides of the weir are closed e.g vertical concrete walls then the entrapment hazard is obviously greater. It is worth noting that some weir sides that appear to be ‘open’ can be ‘closed’ by recirculating eddy currents flowing towards the weir.
8. Orientation of the hydraulic/stopper to the flow
With this criteria we are measuring the angle between the current vector (the direction of flow in the channel at that point,) and the face of the weir. If the weir is 90 degrees to the current vector there is unlikely to be any general water movement toward the downstream end which could cause anything trapped in the weir to be carried to this downstream end. The shallower the angle between the weir and the current vector the greater the potential for this downstream movement.
9. Additional hazards in or downstream of the weir
Here we are looking for additional hazards either in or downstream of the weir and if a hazard is present whether it is in the main flow and likely to affect a person held in or being washed out of the weir. Common hazards include multiple weirs where should a person be washed out of a weir they are then carried into another downstream weir or weirs. Similarly, a weir immediately upstream of a difficult rapid or in-water strainer would present a greater hazard to a person being washed out of the weir as compared to a slow moving clear channel on the downstream side of the weir.
10. Composition of the riverbed at the base of the weir
Weirs can be made of a variety of materials all of which have varying potentials to erode and provide additional entrapment or impact injury to a person being held in the weir recirculation.
Once we have scored the above 10 criteria we will have a number between 0 and 40 which represents the weir entrapment hazard for the water level when the assessment was undertaken. To help compare and communicate this, the assessment tool provides five hazard bands which describe the hazard level from Very Low (1) through to Very High (5).
By revisiting the weir over a variety of water flow levels we can then begin to develop a profile of how the entrapment hazard of that weir changes with different flow conditions.
Assessing rescue difficulty
The assessment of rescue difficulty from a weir is based on the assumption that a person is being held in the weir by the stopper/hydraulic. The very fact that we have a person trapped in the weir is highly indicative of the hazard level of the weir and its potential to cause harm to rescuers. We assess the difficulty of rescue from the weir by looking at a number of criteria and scoring each of these in a similar way to how we calculated the entrapment hazard. As many of these criteria are based on the location and structure surrounding the weir there is likely to be a much smaller level of variation in the scores obtained for rescue difficulty across a range of water levels.
The ten criteria used are:
1. Distance across the weir/river
The further the distance between our working areas on both banks the more difficult it will be to communicate and operate twin bank systems etc. e.g. tethered boats/boat on a highline.
2. Access to both banks
It might not be possible to gain access to both banks and if this is the case it will restrict the rescue options available. When assessing access, we look at whether we have access for vehicles and people, people only or no access to each bank. More complex weirs with in-channel walls can mean that there is effectively no bank access should someone become held in the section of the weir between these mid channel walls.
3. Shape of the weir
The shape of the weir can determine how well some rescue techniques can be applied. Straight weirs tend to allow for easier application of in-water reach techniques e.g inflated fire hose and tethered boat options.
4. Towback
We have already considered the towback distance from the boil line to the base of the weir face as a key criteria for determining entrapment hazards, but it must also be considered when
looking at rescue difficulty. One decision to be made when choosing rescue option is whether we can put a rescuer or tethered boat etc. into/on the towback. Extensive towback with an elevated boil line will increase the hazard level of operating inside the tow back. Also, the greater the distance of the towback the more difficult it is to perform a true rescue from downstream of the boil line.
5. Remoteness
This criteria looks at finding, accessing and resourcing rescue operations at the weir and the more remote the weir location is the greater the allocated score.
6. Nature of the river downstream of the weir
Whilst the nature of the weir is key in determining rescue options available, so is the nature of the river downstream of the weir. This can vary from slow moving shallow water to difficult rapids, with probably the worst case being more retentive weirs downstream of the rescue scene. The nature of the river downstream will determine what techniques and equipment can be deployed downstream of the weir both for performing the rescue as well as providing downstream backup for the rescue.
7. Working area on both banks
In criteria 2 we looked at if we had access to both banks. This criteria now looks at whether we have a suitable working area on each bank that allows us to set up and operate a rescue from that location.
8. Anchors for rope system
There are a number of rope-based rescue options available which may be suitable for a weir rescue including 4 point tethers, boat on a high line and overhead high line rope systems. This criteria assesses whether we have suitable anchor systems on each bank to set up these systems.
9. Available rescue techniques
This is scored on the range of rescue options that could be used at the weir. Some weirs will allow for a full range of single and bank-based techniques to be used including placing rescues/
boats in/on the towback, whilst others, due to their size and level of hazard, might exclude all techniques other then use of a helicopter or overhead highline rope system. Even helicopter rescue might not be an option if there are overhead cables, bridges and other hazards to an aerial approach.
10. Height of the banks above the stopper/hydraulic
The higher the banks are above the weir the more difficult it is to access the weir and the greater the difficulty to recover a victim from the weir up onto the banks, particularly if we have
very steep banks or walls at either side of the weir.
Once all the criteria are assessed we can add them up to give a number between 7 and 43. Depending upon the score it can be allocated to three bands to describe the rescue difficulty at the
weir as low, medium or high.
Assessing weir risk (to members of the public)
Risk can be defined as the likelihood or chance of a particular level of harm occurring. We have already seen how we can assess the entrapment hazard of a weir, so to be able to determine the level of risk it presents we need to assess the likelihood of somebody entering the weir from both the banks or the river. To achieve this the weir is considered as four quarters- upstream river left, upstream river right, downstream river left and downstream river right.
For each of these sections we assess the following:
- Is there public access to this area by land or river?
- Are there any exisnng control measures in place to prevent people entering the weir e.g. fences, booms etc.?
- Ability to self-rescue – taking into account the existing control measures if someone fell in the river beyond the control measures could they potentially self-rescue before they entered the weir or would they be washed away from the weir rather than into the weir.
Once scored, the above criteria will give a score between 0 and 5 which will fit into 5 categories describing the likelihood of a person entering the weir ranging from Very Unlikely (1) through to Almost Certain (5). We can then use a standard 5 x 5 risk matrix to multiply the weir entrapment hazards score and the likelihood score to calculate the risk presented to members of the public by the weir.
Uses of the risk assessment tool
Weirs are permanent structures creating a particular risk in a known location. It is good practice for rescue organisations who might be required to respond to the weir to develop a pre-plan. The weir risk assessment tool can be utilised to understand the entrapment hazard of the weir at different flow levels as well as assessing the difficulty of rescue. This in turn can inform decisions on additional capabilities and equipment that might be needed. The weir risk to members of the public can be utilised to assess the benefit of existing control measures around the weir and potentially highlight improvements that would reduce the need to perform rescues from the weir. If we’re going to undertake rescues from weirs then we need to be training for these in as relevant an environment as possible which is ideally in a weir. The weir entrapment hazard assessment can be used to identify which weirs are suitable for undertaking training on and at which flow levels. Decisions made as to when we can train on a weir and what techniques are possible will directly inform decisions should an actual rescue subsequently need to be performed at the weir. Whilst its primary use is as a pre-planning tool the risk assessment does have a role at an actual incident -particularly if it’s a first time response to a weir that has not had any prior risk assessment undertaken.
For organisations that own and manage weirs, both the entrapment hazard assessment and weir risk assessment are useful tools to help make decisions about which weirs present the greatest hazard and public risk. Following the 2005 drowning in Weir X, which was the starting point for the development of the weir risk assessment tool, it was used to highlight the level of risk presented to the public by the weir which contributed to the decision to have the weir re-designed. The re-design ensured that whilst it still performs its required function to measure water flow down the river it no longer presents an entrapment hazard.
Worked example
Cromwell Weir is on the River Trent in Nottinghamshire, UK, and the former Weir X is on the Afon Tryweryn in North Wales, UK. These are very different structures. Indeed, perhaps the only two similarities are that they are both weirs and have both caused fatalities (multiple fatalities for Cromwell Weir).

Cromwell Weir is a large curved structure, approximately 100m wide, spanning the River Trent adjacent to a navigation lock, in a remote setting in rural Nottinghamshire. There is extensive towback that I’ve measured at over 14 metres. In addition to an upstream channel boom and warning signs, there is a memorial plaque on the bank for 10 soldiers who drowned in the weir in 1975 when undertaking a paddle boat exercise at night. Unfortunately, since then, there have been further incidents including the death of a fisherman in 2012.
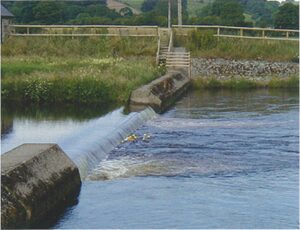
The former Weir X was a much smaller structure in the town of Bala, North Wales. It was on the River Tryweryn, which is dam-released, and regularly would be running during the summer, when it’s used to top up the level of the River Dee. Situated just downstream of the main carpark in the town and with a popular footpath running alongside, it was much more open to human interaction than Cromwell Weir. The weir itself was very insignificant-looking with a drop of less than 50cm and slow-moving water both upstream and downstream of the weir. Without undertaking a full weir risk assessment, the only indication as to the strength of the weir’s recirculation was the collection of tennis balls, sticks etc that would often be held against the face of the weir by the towback.
When we assess both weirs for entrapment hazard, we get the following:
| Cromwell Weir | Former Weir X | |
| Entrapment hazard score | 28 | 26 |
| Entrapment hazard level | High (4) | High (4) |
The fact that both are high risk and there is little difference between the actual scores might seem surprising at first. However, both structures have enough towback to get the maximum allocation for that criteria and in both cases the stopper/hydraulic is uniform with no breaks and has the potential to hold floating debris. Both structures are at 90 degrees to the current vector and have vertical or near vertical weir faces. Weir X has a much smaller height which is largely explains the difference in hazard scores between the two weirs. With large concrete walls the sides of Cromwell Weir are clearly ‘closed’ whereas the sides of Weir X appear to be open. Closer inspection however showed that the large downstream eddies at both sides of the weir have strong eddy currents flowing back towards the weir which effectively ‘close’ both sides of the weir.
Neither weir has a highly elevated boil line and there are no additional hazards downstream which explains why neither make it into the ‘Very High’ category for entrapment hazard.
When we assess both weirs for Rescue Difficulty we get very different results:
| Cromwell Weir | Former Weir X | |
| Entrapment hazard score | 33 | 16 |
| Entrapment hazard level | High | Low |
- The large width of Cromwell Weir is too much to operate tethered boats.
- Greatly reduces the potential for any bank-based conditional rescues to be successful.
- The combination of river width and a large powerful recirculation pretty much rules out any tethered swimmer options.
- Powerboat operations below the weir are unlikely to provide a true rescue capability from the weir.
- Helicopter would seem to be the only effective solution, and there are no overhead obstructions to prevent its use.
The former Weir X by contrast had a wide variety of rescue options available. The narrow river channel allowed for both reach and throw conditional rescues to be undertaken if the victim was able to hold onto these. Whilst the entrapment hazard has proven to be lethal, a properly trained and equipped rescuer can perform tethered swim rescues from the weir and a variety of tethered boat operations can be performed with the boat able to cross the boil line and onto the towback in a controlled and stable way.
We can therefore see that whilst both weirs present a similar level of entrapment hazard there are significant difference in the rescue difficulty.
In terms of risk presented by the weirs to members of the public, including river users, Weir X sees much more public access. The main potential interaction with Cromwell Weir would be from boats navigating the Trent and using the lock adjacent to the weir. There is a large boom across the river upstream of the weir located just below the lock entrance but no boom on the downstream side.
When we undertake the Weir Risk Assessment we get the following outcomes for each weir:
| Cromwell Weir | Former Weir X | |
| Entrapment hazard score | 28 | 26 |
| Entrapment hazard level | High (4) | High (4) |
| Likelihood of causing harm score | 2 | 3 |
| Likelihood of causing harm level | Unlikely (2) | Likely (3) |
| Weir risk score | 8 | 12 |
| Weir risk level | Medium | High |
The combination of a ‘high’ entrapment hazard and a location that means it’s ‘likely’ to cause harm to members of the public results in a ‘high’ weir risk level for Weir X. Whilst Cromwell
Weir scores ‘unlikely’ in terms of whether it will cause harm to members of the public the fact that the risk of entrapment is ‘high’ results in it having and overall risk level of ‘medium’.
Paul O’Sullivan is the Managing Director of R3 Safety and Rescue – specialist rescue training and equipment supply business based in North Wales, UK. He’s been delivering swiftwater and flood rescue training for over 20 years and teaching Rescues from Vehicles in Water classes since 2004. He sits on the UK’s National Fire Chief’s Council Inland Water Technical Response Group.
This article originally appeared in Technical Rescue Magazine, and is reproduced with permission from the author.
Weirs and Low Head Dams – A Guide For Rescuers – Part 1
Weirs are also called low head dams and barrages. They are an artificial obstruction in a channel that results in elevated upstream water level for some if not all flow conditions. This definition is very benign so why are they of particular interest to us in the swiftwater and flood rescue community?
Whilst the definition focuses on the weir’s ability to raise the water level on the upstream side of the weir, it’s what happens on the downstream side that is normally of more concern to us.
As water flows over the face of the weir there is the potential to create a ‘re-circulation’ feature on the downstream side when surface water is pulled back into the face of the weir. Whilst we commonly have two names (weir and low head dam) to describe these structures, there are many more words used to describe this re-circulation including hydraulic, hydraulic jump, hole, stopper etc. Depending on the strength of the recirculation it can have the ability to trap floating debris, objects, equipment and potentially people.
The same re-circulation features can be found on the downstream side of natural river features and these can also provide significant risk, however being natural features there is often a point of weakness that allows trapped objects/people to be flushed out. With man-made weirs we have the potential to combine the ability to generate very strong and deep recirculation with the uniform, smooth surfaces of a man-made structure which may not have any points of weakness in the recirculation, thus making it difficult if not impossible for anyone who becomes trapped in the re-circulation to escape.
That said not every weir creates dangerous re-circulation features and even those that do, may not have these features present at all water levels. For example, consider a weir that at medium water levels has a significant re-circulation. If water levels are reduced (summer flows, after periods of low rainfall etc) then the amount of water flowing over the weir could be significantly reduced which in turn could reduce the size and strength of the re-circulation. Equally, when the river level rises, and we are in high flow/flood conditions, there is potential for water flowing over the weir to effectively ‘drown’ the structure so that it disappears under the water and the surface recirculation disappears. From this example we can see that the level of hazard and risk created by a weir can vary with water levels so if we want to risk assess a weir, we need to do this at a range of water flows to gain a complete profile. I will look at weir risk assessment in more detail in part two of this feature.
Weir hydrology
An understanding of the basic hydrology of weirs will allow us to appreciate the nature of the re-circulation hazard they can present. As water falls over the face of the weir it will create a low-pressure effect which causes the surface water on the downstream side of the weir to flow upstream towards the weir face. This is the same kind of effect that creates the upstream flow of water in an eddy as the main current flows past the obstacle creating the eddy.
This surface water flowing back upstream towards the weir face is known as ‘tow back’ and if this is of sufficient size and strength can cause floating objects to be trapped in the weir.
The main water flow over the weir face will flow to the base of the weir and whilst some will continue flowing downstream, much of this water can flow up to the surface on the downstream side of the weir creating a distinct ‘boil line’ where it reappears on the surface . Some of the water returning to the surface at the boil line will feed into the surface tow back flowing upstream to the weir face, whilst the remainder will move downstream from the boil line and is commonly called the ‘out wash’.
How powerful the recirculation hazard will be on any given weir will be a result of the relative strengths and depths of the various waterflows as described above and these will change relative to the amount of water flowing over the weir.
The design of the channel bed at the base of the weir is one of the key determining features as to whether a weir will have a significant re-circulation hazard. Many modern weir designs will have a ‘stilling basin’ on the downstream side of the weir face. This is a trough like feature which has the effect of increasing the amount of water flowing to the surface at the boil line and the size and extent of the tow back. Natural ‘Stilling basins’ can be created by the depositing of stones and boulders a short distance after the weir but man-made basins can have an artificially long apron making it possible for the boil line to be a significant distance downstream of the weir face with the surface tow back flowing upstream from the boil line to the face of the weir.
Why do we have weirs?
Weirs have been constructed for hundreds if not thousands of years and for a wide variety of reasons. The raised level of water on the upstream side of the weir are commonly used for ensuring water availability to divert flows into locks and mills etc. More recently weirs are commonly constructed for channel stabilization/erosion control, water flow measurement and aiding fish passage.
Steeper channels with increased water velocity have great ability to erode the banks and channel bed. By constructing a number of weirs, it is possible to create a series of engineered drops with low energy water between the weirs thus reducing the potential for channel erosion.
Weir risks
To the unaware, many weirs can appear very benign structures. The combination of slow-moving flat water above the weir, a smooth weir face and relatively slow-moving water downstream of the weir can cause many people to underestimate the power and retentiveness of the weir. There are unfortunately numerous examples of where people have entered weirs due to a lack of understanding of the risk they present often with tragic consequences. Particular examples I am aware of include members of the public jumping into weirs in an effort to rescue dogs which entered the weir to fetch floating debris, commercial rafts which failed to make the ‘take-out’ eddy above the weir and water rescue teams in powerboats accidentally crossing the boil line and being taken into the weir by tow back both in training exercises and rescue call outs.
As rescuers called to a person trapped in a weir, much of the weir risk assessment has been done for you by the victim. The very fact that they are trapped in the weir tells us a lot about the nature of the weir and the risks it presents to us as rescuers. We have the same set of rescue techniques available to us as for other swiftwater and flood rescues, but we need to decide if they are applicable to the weir we are faced with and if so whether we need to adapt them to this purpose.
Weir rescue options
Bank-based reach and throw options
We can separate the variety of rescue techniques available to swiftwater and flood rescuers into two categories; conditional rescues and true rescues.
- A ‘conditional rescue‘ technique is one that requires the victim to actively take part in their rescue and if they fail to do so the rescue will not work e.g. throwing a throwline to a casualty in the water is totally conditional upon their ability to hold onto the rope that has been thrown to them. If they are unable or unwilling to do this the rescue fails regard less of how good the rescuer is at throwing throwlines!
- A ‘true rescue‘ technique does not require any input from the casualty. Thus, the success of a tethered swim rescue is all about the ability and skill of the rescue team and does not rely on the casualty’s input.
All the variety of bank-based reach and throw options (eg. throwlines, reach poles, inflated fire hose) are conditional rescues and rely on the victim’s ability to hold onto the rope etc. This can be very difficult to do when trapped in a weir and therefore other ‘true’ rescue options will probably need to be utilised. That said, there are great benefits to throwing floating objects to anyone trapped in a weir to hold onto as the added buoyancy they provide will help them stay at the surface.
Downstream backup
Even though the focus is on a person trapped in the weir we need to ensure that we are still putting in as effective downstream backup as possible. It is possible that the trapped person might be washed out of the weir and we need to be able to rescue them if this happens. Having just spent time trapped in the weir it is very unlikely that they will be able to assist in their own rescue, so we really need downstream back up to be a ‘true’ rescue option – contact swim, boat etc
Adapting tethered boat techniques to weirs
When operating around weirs we need to appreciate how the current forces and risks might have altered as compared to a normal channel-based rescue. Tethered boat rescues are a potential choice for weir rescues whether we’re using the tether lines to keep the boat downstream of the boil line or to allow us to hold the boat over the boil line and in the tow back. When tethering boats in a normal channel we look to use multiple points connected with a load distributing anchor system on the boat for each upstream tether rope as they will see the greatest load and we do not want one of the lines to fail. As the downstream tether ropes will see less loading, we will commonly just clip these to a single attachment on the boat as failure here would be less consequential. However, when working on the downstream side of a weir it is now the downstream lines that are critical in stopping the boat being moved upstream by the tow back. Consequently, we need to now rig these, so they are attached to at least two points on the boat with a load distributing anchor.
Boat on a highline systems
The ability to control boat position and deal with larger water forces that we get from boat-on-a-highline systems are ideally suited to some weirs. These systems need to be pre-planned and trained for or else they are slow to set up and complicated to operate smoothly.
Commonly, boat-on-a-highline systems are rigged with the trackline on the upstream side so that the main control rope to the boat (reeving line) is used to control/move the boat against the river flow. With weirs it is not uncommon for the force of the tow back to be greater than the river flow both upstream and downstream of the weir so consideration should be given to either positioning the track line downstream of the weir rather than on the upstream side. BOAH systems can be quite complex to set up, rescuer-intensive and requires excel lent communications between all rescuers. The main control/reeving rope can be used to control the boat from entering the weir or to hold the boat on the tow back and means it is easier to recover the boat from the weir. Downstream track lines are also of particular use on weirs with high vertical faces.
Once the distance across the weir becomes too great to effectively manage ropes then tethered boat, including boat on a highline systems are no longer suitable. Rescues using powered boat and helicopters are still potential options to consider.
Powered boat rescues
Operating around weirs in powered boats requires a high level of experience and skill from the boat operators and an understanding of the hazard the weir can present. There are numerous examples of crews crossing the boil line (both intentionally and unintentionally) from the downstream side of a weir without realising the effect this would have on their boat, only to find the boat being carried into the face of the weir by the tow back and potentially capsized. Propellers are much less effective in the aerated water of the tow back so the ability to use the engines drive to avoid the weir once over the boil line is greatly diminished.
Powerboats operating downstream of a weir to put in place effective ‘true’ downstream back up should anyone be washed out of the weir are highly beneficial if water conditions allow for their use. However, the closer we operate to the weir the greater the risk of entering the weir. There are techniques for ‘tandem’ boat operations where boats are connected by rope with the idea being that the downstream boat can prevent the upstream boat from being carried over the boil line into the weir. Such techniques require extensive levels of relevant training and as well as being highly trained in their use, if boat crews are to use these techniques, they need to ensure the potential benefits are in proportion to the operational risks.
Helicopters and cranes and hydraulic ladders
Helicopters have the most obvious potential to position a rescuer immediately above the tow back of the weir so the rescuer can make contact with the victim in the weir and either lift them from the weir or pull them through the water to the downstream of the boil line. The same might be true of a nearby construction as was seen on the Des Moines River in Iowa, USA in 2009. It may also be true of fire service hydraulic ladder/platforms used for high-rise incidents and fires. Some have the ability to operate at very low and even reverse angles but such operations require a very clear understanding of the load capabilities which diminish massively with decreased angle and greater extension. There are many photos and YouTube videos showing how easy it is to overload a boom arm, whether it be a crane or an HP/ALP so such measures will normally be a last resort. Nevertheless, as soon as a report of a person trapped in a weir is received by the emergency services, in addition to the water rescue team(s), rescue helicopter and pre-approved hydraulic ladder/platform deployment should be considered if available. If, on arrival of the rescue teams at the weir they can deal with the situation, the larger assets can then be stood down. If decisions on alternative tasking are left until arrival on scene or after failure of initial rescue attempts, then launch and travel time for the helicopter/large vehicle may mean it arrives on scene too late.
Relevant training
As seen above, the full range of swiftwater rescue techniques are potentially applicable to weir rescues, but their use needs to be determined by a process of risk/benefit assessment. Whilst there are weirs where it would be suitable to perform a contact swim rescue or place a raft over the boil line to perform a rescue, there are others where such options would result in an unacceptable level of risk to the rescuers. Weir rescue needs to be pre-planned for and through this process, we need to ensure that we have the required capability, personnel, equipment and training to carry out the rescue techniques most appropriate to that weir. The time to determine which techniques are appropriate is on a training session following a suitable risk assessment, as opposed to waiting for an incident to occur at the weir and trying to work out what to do at that point. The ability to risk assess the hazard of a weir is essential if we are to conduct training and operational rescues from weirs, and I will look at this process in part two.
Paul O’Sullivan is the Managing Director of R3 Safety and Rescue – specialist rescue training and equipment supply business based in North Wales, UK. He’s been delivering swiftwater and flood rescue training for over 20 years and teaching Rescues from Vehicles in Water classes since 2004. He sits on the UK’s National Fire Chief’s Council Inland Water Technical Response Group.
This article originally appeared in Technical Rescue Magazine, and is reproduced with permission from the author.
The benefits of Rescue 3 training
About us
Rescue 3 Europe is the accrediting body for these courses. We produce and develop technical rescue and safety courses in a number of fields, including water, rope, boat, confined space and ice. We accredit and oversee all Rescue 3 training providers, instructors and students within Europe. Our sister company, Rescue 3 International, does the same in the rest of the world.
Rescue 3 courses have been delivered for over 40 years, since 1979. Currently, there are over 300 Rescue 3 training providers worldwide, with 2,500+ instructors delivering Rescue 3 courses to over 60,000 students in the last 3 years alone.
Best practice
We are constantly revising and updating the content of Rescue 3 courses, to reflect best practice and industry standards. Rescue 3 courses are reviewed and revised by subject-matter experts, who form the Rescue 3 technical steering committees. The course content, learning outcomes, and instructor and student resources receive input from experts worldwide, providing a pool of expertise that is second-to-none.
Widely used
Rescue 3 courses are undertaken by all branches of the emergency services, mountain rescue, and other voluntary rescue services, at local, regional and national levels, across Europe and worldwide. In addition, the relevant Rescue 3 safety and co-worker rescue courses are undertaken by industrial and infrastructure organisations, so they have appropriate training for the complex environments they work in.
Rescue 3-trained rescuers have been on the front lines of many of the largest and most prominent technical rescues in recent years, as well as managing such incidents behind the scenes. There are also many thousands of Rescue 3-trained personnel working and operating safely in potentially hazardous environments day in and day out.
Resources
Rescue 3 students and instructors have access to a wide range of resources, developed by Rescue 3 Europe, including manuals, field guides, and video resources. These resources are available in all the course fields that Rescue 3 training providers deliver courses in, and are translated into an ever-increasing number of languages.
Standards and assessment
Every course is delivered according to the Rescue 3 standards, backed up by skill sheets, course learning outcomes, and key teaching points for instructors. Every Rescue 3 course is assessed, allowing successful candidates to leave with documentary evidence of competence. It’s important to receive the best possible training, which is offered by Rescue 3 training providers. It’s also vitally important that there’s an audit trail that allows individuals and organisations to be able to evidence that they have received training according to industry-leading standards, and evidence of assessment.
The Rescue 3 standards enable best practice, standardisation of training and multi-agency interoperability.
Database
Rescue 3’s world-leading training provider database is the central hub for all Rescue 3 training providers to log and document the training that they deliver. Every Rescue 3 student has their record of training securely stored in this database, along with full details of that course, scanned copies of the training record skill sheets with student and instructor signatures, and the qualification expiry dates. Successful students receive a PDF copy of their training certificate by email, and can optionally purchase an ID card which uses a QR code system to provide a live record of all their qualifications, which can be used as evidence of qualifications on job sites or multi-agency events.
Who trains with Rescue 3?
Emergency services
Throughout Europe, all branches of the emergency services have taken Rescue 3 training courses in water, rope, boat, confined space and ice rescue. Fire and rescue services, police and ambulance/paramedic teams are called upon to attend at such incidents. The various branches of the military have also undertaken Rescue 3 training in order to operate safely in specialised environments.
Search and rescue teams
Rescue 3 training courses are key for a myriad of search and rescue teams, both volunteer and professional. Mountain rescue, lowland rescue, cave rescue and search dog teams are regularly called upon to operate in or near water, at height or in confined spaces. Specialist animal rescue organisations also work alongside the emergency services and rescue teams, as do civil defence organisations.
Infrastructure
Workers from utilities companies operate in a variety of complex environments – at height, near water, and in confined spaces. Rescue 3 training can enable them to work safely in these environments, rescue a co-worker in the event of an incident, or operate in exceptional circumstances such as wide area flooding. Mass transit and aviation companies also have key workers who need appropriate training to operate in such environments.
Industry
Rescue 3 has a suite of safe working and co-worker rescue courses, for a range of environments, including at height, in confined spaces and near water. All branches of industry who require safety training for their employees turn to Rescue 3, including the fields of petrochemicals, manufacturing, construction, nuclear energy, renewable energy, and more.
National, regional and local government
A growing number of national, regional and local governments are adopting the Rescue 3 training standards, as prerequisites for those working in complex environments within their jurisdiction, including for infrastructure, industry and leisure tourism.
Education
At universities and colleges, those undertaking research in and around complex environments require appropriate safety training from Rescue 3. Teachers and youth workers may also require awareness or safety training, depending on the nature of their work.
Outdoor professionals
Adventure tourism organisations and adventure activity providers must have suitably qualified staff, with appropriate safety training. The Rescue 3 whitewater rescue courses are used as default training for raft and kayak guides throughout the world. Major international extreme sports events, which require technical rescue safety cover due to the nature of the environment, make use of Rescue 3-trained staff.
Precision planning and training for working safely at height
Mitigating against falls from height figures in many industrial contexts, and training excellence is pivotal to this.
Preparedness for potential accidents, a thorough understanding of hazards and appropriate training are central to achieving workplace safety. Where it comes to working at height, a fall of just a short distance can prove fatal, or leave a worker with permanent disabilities.
It’s whey the practice of developing a risk assessment is so important. Anticipating the risks and putting plans in place to combat them is consistent with widespread legislation, which exists to keep your workforce safe and well in their working lives.
If you can’t eliminate the hazard from the required task entirely, be sure you have a plan for safe working.
Part of a thorough risk assessment is, of course, anticipating the worst case scenario and it’s in just such situations that emergency procedures should be in place.
In an emergency
The UK’s Work at Height Regulations require employers to plan for emergencies and rescue, and similar requirements exist in many other jurisdictions. The best rescue is one that doesn’t have to be performed, and so the hierarchy of rescue begins with awareness of safe operating procedures. All workers must be trained by suitably qualified instructors to operate safely at height.
Self-rescue is the next step on the hierarchy of rescue. With appropriate training and equipment, workers will be able to get themselves out of trouble in the unlikely event of a minor incident occurring.
A broader awareness of rescue procedures goes hand in hand with self-rescue. A conditional rescue is one in which the victim is able to play a part to aid rescuers. The flip side of this is a true rescue, where the victim can’t aid rescuers. By their very nature, true rescues are more complicated and can be more time consuming. Clearly, an informed and trained victim will reduce risk and impact if a rescue is needed.
Following on from self-rescue is co-worker rescue. At a minimum, everyone working at height must be able to keep themselves safe, their co-workers safe, and be able to perform basic co-worker rescue. Time can be a critical factor in rescues, so it’s ideal to have a trained rescuer already on the scene and with the necessary PPE and equipment already in place. Knowing that employees can rescue a co-worker before a situation escalates is a vital part of an employer’s plan for emergencies and rescue.
Anticipating risk
An employer’s plan for rescue must begin with a risk assessment. This must take into account the obvious factors such as nature of the work being undertaken, location of that work, environmental hazards and the skill and training levels of those undertaking the work, as well as any access issues for additional rescue teams. This risk assessment will then lead on to the pre-plan for emergencies and rescue, ensuring that everyone is suitably trained, and knows how to operate if an incident occurs.
The scope of the rescue plan is directly informed by the risk assessment. At the lowest level of requirements, safe working at height training and co-worker rescue at height training may suffice. However, employers with wider requirements, in terms of worker numbers, nature of the work/facility or perhaps access/egress issues, may need to provide a stand-by rescue team. This could be staff trained to provide such rope rescue, or buying in a contracted rescue service. Whilst the statutory emergency services will probably become involved in a major incident, it is not sufficient under the regulations to rely on them to provide your rescue capability.
A rope rescue team can wholly comprise of Rope Rescue Operators, Rope Rescue Technicians, or a combination, depending on what they are tasked to do. Rope Rescue Operator training will imbue employees with a great deal of knowledge for working safely at height and undertaking rescues. Those employees who require technician-level training will begin with operator-level training. Beyond this, specialist-level training is also available for employers with more specific requirements.
A suitably trained and qualified rope rescue team can form an important part of any employer’s rescue plan. As with everything relating to health and safety, employers should hope for the best, but plan for the worst. Having employees suitably trained as a rope rescue team, prior to any involvement by the emergency services, can ensure a swift, safe and successful response to any incident.
Responsibilities and practicalities
Employers can follow a number of training pathways. The first of these is to have employees trained wholly in-house.
Regulation 5 of the Work at Height Regulations (2005) states that:
- You must ensure that everyone involved in the work is competent (or, if being trained, is supervised by a competent person). This includes involvement in organisation, planning, supervision, and the supply and maintenance of equipment.
Whilst employees may be able to pass on knowledge of day to day operations to co-workers, there is a large leap from this to meeting the competency requirements for training for emergencies and rescues. If following the wholly in-house path, an employer would have to invest heavily in an employee or employees who were developing, in isolation, an in-house training scheme that could meet the legal requirements. These employees would have to constantly keep abreast of all latest developments in the field and current best practice, as well as documenting the evidence of this experience, to satisfy any and all questions that may be asked of them in the worst case scenario of an incident occurring.
A simpler and more cost-effective training pathway is for employers to seek an external training provider, suitably accredited to deliver the highest standards of safe working at height and rope rescue training.
Regulations 4 and 6(1, 2) of the Work at Height Regulations (2005) say that you must:
- Ensure that no work is done at height if it is safe and reasonably practicable to do it other than at height.
- Ensure that the work is properly planned, appropriately supervised, and carried out in as safe a way as is reasonably practicable.
- Plan for emergencies and rescue.
- Take account of the risk assessment carried out under regulation 3 of the Management of Health and Safety at Work Regulations.
Furthermore, regulation 6(5)(b) states that:
- Where other precautions do not entirely eliminate the risk of a fall occurring, you must (as far as it is reasonably practicable to do so) train those who will be working at height how to avoid falling, and how to avoid or minimise injury to themselves should they fall.
By undertaking training with a suitably accredited external training provider, an employer will meet, and enable their employees to meet, these requirements. Of course, simply outsourcing training to a third party who doesn’t have suitable qualifications themselves won’t meet these requirements. It’s vital that any training is delivered by an organisation that is backed by a large accrediting body that offers international accreditation and recognition of their qualifications.
Larger employers, or those with very specific operational requirements, may look at the training pathway of becoming an externally accredited training provider in their own right. For an employer with staff externally accredited, there’s only a small leap to put them through instructor training and assessment with the accrediting body.
This will allow an employer to deliver in-house training, using staff that they can be sure meet all the legal requirements. These staff will have the support of an international accrediting body with an ever-expanding breadth of knowledge. With qualifications valid for a set period of time, before a simple update workshop needs to be undertaken, an employer ensures that its employees are always working to current best practice.
Specific training methods – case studies
Obviously, different industrial environments will present workers with different challenges – something that is illustrated in the following anonymised case studies, in which appropriate training not only led to cost savings but increased productivity.
Wind turbine context
A wind turbine company, operating three wind turbines with external ladders on a single site employed 5 wind turbine operators, including a team leader. In order to meet the requirements of the Work at Height Regulations (2005), the management and the team leader actively work on a plan for emergencies and rescue. However, they find that the team leader is increasingly being drawn away from their daily duties.
The management consider hiring another wind turbine operator, in order to free up more of the team leader’s time, but instead sought Wind Turbine Operator training from an external training provider which offered international accreditation.
The nature of the training is industry-specific and site-specific, but broadly maps to safe working at height and co-worker rescue at height training. The qualifications are valid for a period of three years, after which recertification is required.
The training was a mix of classroom-based and practical. Of particular use to the team leader are the lectures on UK regulations and legislation, risk assessment, pre-planning, developing rescue plans, incident size-up and incident management.
These lectures can be bespoke/developed specifically for a particular company and its operational area. In this way, the team leader was empowered to fully develop a plan for emergencies and rescue after the training – made significantly easier to communicate to co-workers largely due to the increased knowledge of the operators.
The practical sessions include training for different types of fall arrest equipment, use of lanyards and shock absorbers, emergency descending, and rescue of a co-worker from fall arrest systems. Participants said they experienced an increase in their ability to work safely at height, as well as to rescue co-workers in the event of an incident occurring, which impacted positively on workplace morale.
A shipping context
A port authority responsible for more than half a million TEUs (shipping containers) per annum employs more than 500 workers throughout the authority. Work at height and using cranes takes place continuously over a large operational area. The authority has identified that there were higher than expected working days lost per annum as a result of incidents at height and sought a solution to the concurrent goals of increasing worker safety and minimising the financial losses associated with lost working days.
Analysis of operating procedures indicated that there was scope for improvement within emergency and rescue plans, and the authority decided on a two-stage process for meeting its goals.
The first stage was for the training of a dedicated rope rescue team. This was done through an external training provider to the level of Rope Rescue Technician. For operational reasons, the rope rescue team comprised members of their on-site advanced first aid team, allowing a fully coordinated response to any incidents, and the speediest delivery of stabilisation of any patients.
The training mixed classroom-based and practical sessions. The lectures include topics such as relevant legislation, size-up, pre-planning, ICS, on-scene safety briefings, site control, medical considerations, equipment care and maintenance, and system safety checks.
Practical sessions developed from the elements of safe working at height and co-worker rescue at height training. They looked at team-based solutions that are required when co-worker rescue solutions are not sufficient. In addition to team-based raising and lowering techniques, the Rope Rescue Technicians are trained in a number of personal skills vital for their work. These include key skills, such as passing knots, anchors and deviations when ascending/descending, as well as rope transfers and changeovers. The practical sessions also cover casualty access and care elements.
The second stage of this organisations action plan will involve training key staff to rope rescue instructor status, and, over the longer term, becoming an externally accredited Rescue 3 Europe training provider in their own right. This will enable them to train their rope rescue team in-house, to the highest standards, whilst ensuring their instructors remain current with industry best practice. These instructors will also be able to train the wider body of employees to work safely at height.
The impact on reducing lost working days and improving worker safety has already been seen. Because the training is internationally accredited, it has benefitted the authority when recruiting new employees: many of them already hold this qualification, and thus are operationally up to speed much more swiftly than those who don’t yet hold it.
This article originally appeared in Health and Safety International, and is reproduced here with the author’s permission.